How to Sharpen a Japanese Knife: A Beginner’s Step-by-Step Guide
As an Amazon Associate, we earn from qualifying purchases. Our recommendations are independent and based on research, not sponsorships.
Learning how to sharpen a Japanese knife is simpler than most beginners fear. A good knife is only as good as its edge — and even the finest VG-10 blade goes dull with use. The good news? With one whetstone, a bit of water, and twenty unhurried minutes, you can bring a tired blade back to slicing paper cleanly.
This guide walks you through the whole process step by step, in plain language, for complete beginners. We’ll cover the one tool you actually need, the angle that matters, the exact sequence of strokes, how to know when you’re done, and the mistakes to avoid. By the end, sharpening will feel less like a chore and more like the quietly satisfying part of owning a good knife.
(New here? It helps to understand what makes Japanese knives different first — the hard steel and thin edge are exactly why we sharpen them this particular way.)
Why Whetstones — and Why Not Pull-Through Sharpeners
Before anything else: do not use a pull-through sharpener or an electric sharpener on a Japanese knife. This is the single most important rule.
Those gadgets remove too much metal, force a fixed (and usually too-wide) angle, and can chip the thin, hard Japanese edge. They’ll undo everything that makes the knife special.
A whetstone (also called a waterstone or sharpening stone) is the right tool because it gives you full control over the angle, removes only a little metal, and works on hard Japanese steels (60+ HRC) that a honing steel can’t even touch. It’s how these knives have been sharpened for centuries, and it’s genuinely not hard to learn.
What You’ll Need
You don’t need a drawer full of gear. The essentials:
- A combination whetstone. For beginners, a dual-grit stone with 1000 grit on one side and 6000 grit on the other covers almost everything. The 1000 side does the real sharpening; the 6000 side polishes and refines. A King 1000/6000 combination whetstone is the classic, affordable starting point.
- Water. That’s why they’re called waterstones.
- A stable surface. A damp towel under the stone (or a stone holder) keeps it from sliding.
- Patience. Genuinely the most important item on the list.
A note on grits: A 1000-grit stone handles about 90% of normal sharpening. A 3000–6000 finishing stone adds polish and refinement. You only need a coarse 400-grit stone if you’re repairing a chip or reviving a severely neglected blade — most people never do.
Step 1: Soak the Stone
If your whetstone is a “soaking” type, submerge it in water for 10–15 minutes, until the stream of tiny bubbles stops rising. That tells you the stone is fully saturated.
If your stone is labeled “splash-and-go,” skip the soak — just wet the surface and keep it wet as you work.
Set the stone on a damp towel on a stable counter, with the coarser (1000) side facing up to start.
Step 2: Find Your Angle
This is the part beginners worry about most, and it’s simpler than it sounds. For a standard double-bevel Japanese knife, you want to hold the blade at roughly 10–15 degrees to the stone — much shallower than a Western knife.
A foolproof trick: stack two coins under the spine of the blade. That gap gets you close to the right angle without any guesswork. (Some sharpening kits include a plastic angle guide that clips to the spine — also fine.)
Don’t obsess over hitting an exact number. Pick an angle that feels low and, above all, keep it consistent through every stroke. Consistency matters far more than precision.
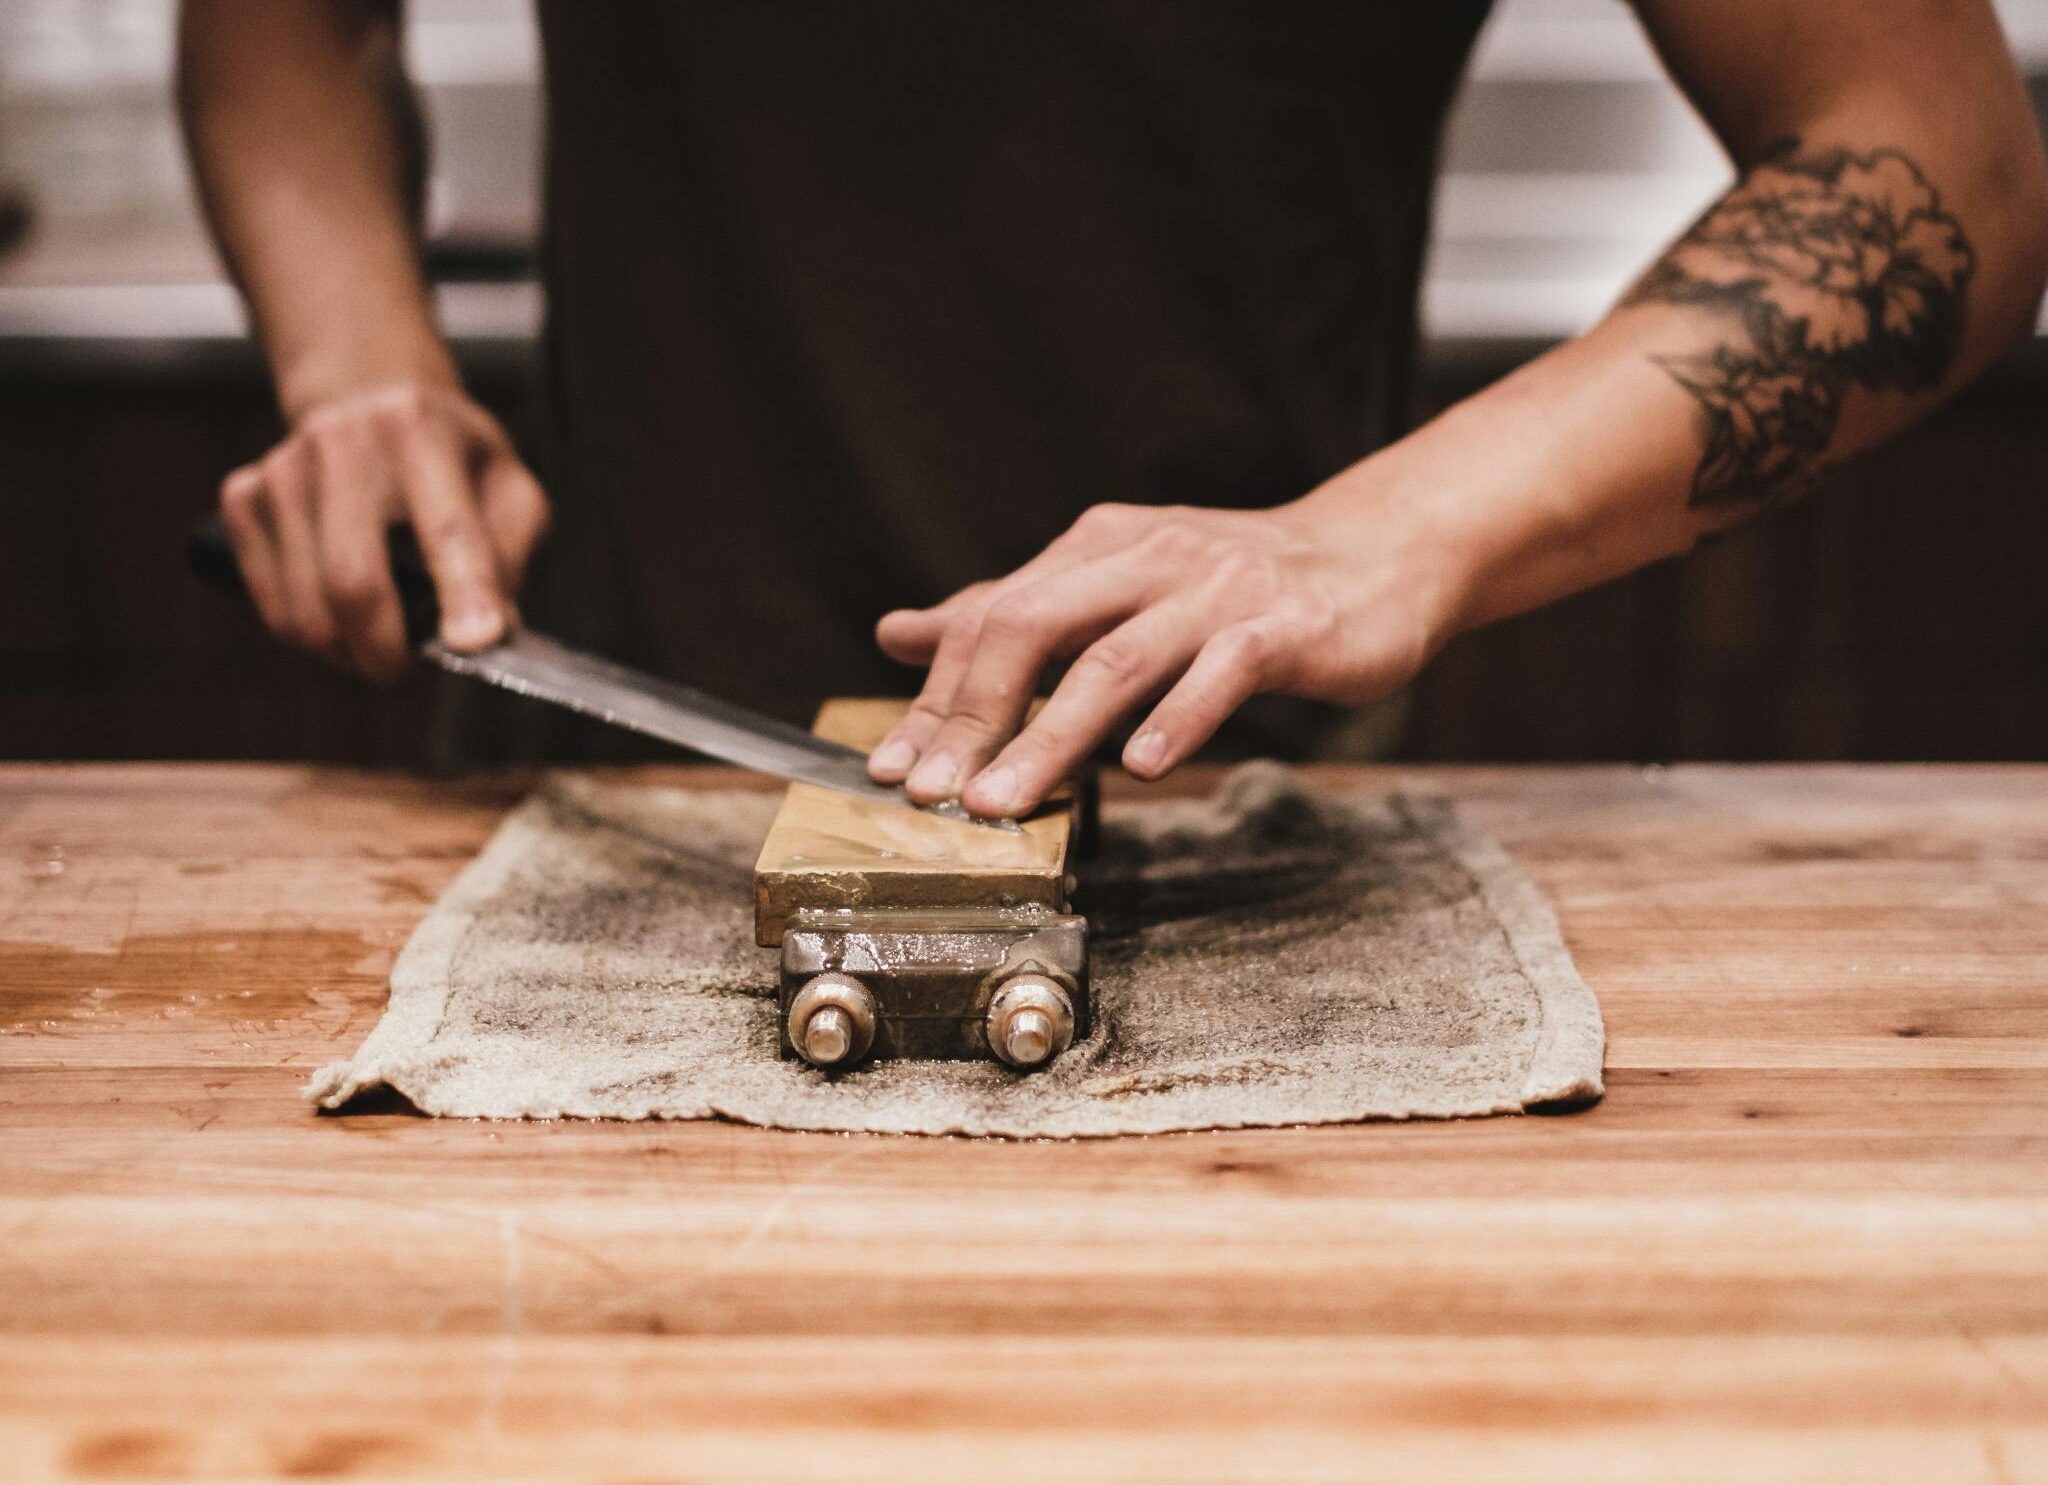
Step 3: Sharpen on the 1000-Grit Side
Now the actual sharpening. With the coarse side up:
- Hold the handle in your dominant hand, and rest two or three fingertips of your other hand flat on the blade, near the edge — this controls pressure and keeps the angle steady.
- Push the blade away from you across the stone in smooth, controlled strokes, maintaining that low angle. Apply gentle, even pressure on the push; ease off on the return.
- Work one section of the edge at a time — heel, middle, tip — covering the whole length with several passes each.
- After a set of passes on one side, flip the knife and do the other side to keep the edge balanced.
Keep the stone wet throughout — splash a little water on whenever it looks dry. You’ll build up a grayish slurry on the surface; that’s normal and actually helps the cutting action.
Step 4: Feel for the Burr
How do you know the 1000-grit side has done its job? You feel for the burr (also called a wire edge).
After sharpening one side for a while, gently run a fingertip from the spine toward the edge on the opposite side (never along it). When you feel a tiny rough lip catching your finger along the whole length, you’ve raised a burr — that means you’ve sharpened all the way to the edge. Now sharpen the other side until you feel the burr flip to the first side. This back-and-forth is the heart of sharpening.
Step 5: Refine on the 6000-Grit Side
Flip the stone (or switch stones) to the 6000-grit fine side. Repeat the same motion with lighter pressure — you’re polishing now, not grinding.
A few light, alternating passes on each side refine the edge to a smooth, keen finish and remove the burr you raised earlier. This is what takes a knife from “sharp” to “scary sharp.”
Step 6: Test the Edge
The classic test: hold up a sheet of printer paper and slice down through it. A properly sharpened knife glides through cleanly, with no tearing or catching. A tomato is the other great test — the blade should bite the skin instantly without pressure.
If it still drags, you likely lost your angle or didn’t fully raise the burr. Don’t be discouraged; go back to the 1000 side and try again. Sharpening is a feel you develop, not a formula.
How Often Should You Sharpen?
For a home cook with regular use, a full whetstone sharpening every two to four months is plenty. Professionals do it far more often.
Between sharpenings, you can maintain the edge with a few light strokes on the 6000-grit stone, or a ceramic honing rod (never a steel one — steel rods are too hard and can damage Japanese edges).
Common Mistakes to Avoid
A quick checklist of what trips people up:
- Inconsistent angle — the number one issue. Lock your wrist and move from the shoulder.
- Too much pressure — let the stone do the work, especially on the fine side.
- A dry stone — keep it wet; a dry stone cuts poorly and can scratch.
- Rushing — sharpening rewards a calm, unhurried session more than speed.
- Skipping the burr check — if you never raise a burr, you never actually reached the edge.
- Using a pull-through sharpener “just this once” — don’t. It’s the one thing that can genuinely harm the knife.
Conclusion
Sharpening a Japanese knife comes down to a simple sequence: soak the stone, find a low and consistent angle, work the coarse side until you raise a burr, refine on the fine side, and test on paper. Do it every few months and your blade will stay as sharp as the day you bought it — sharper, probably.
It’s a skill, not a mystery, and it’s part of what makes owning a good Japanese knife so rewarding. If you’re still choosing your blade, our guides to what makes Japanese knives different and gyuto vs santoku will help you pick one worth keeping sharp.
Frequently Asked Questions
What angle do you sharpen a Japanese knife at? About 10–15 degrees per side for a standard double-bevel knife — much shallower than the 20+ degrees of a Western knife. Stacking two coins under the spine is an easy way to approximate it. Consistency matters more than hitting an exact number.
What grit whetstone is best for beginners? A 1000/6000 combination stone is ideal. The 1000 side handles routine sharpening; the 6000 side polishes the edge. You only need a coarse 400-grit stone for repairing chips.
Can I use a pull-through or electric sharpener on a Japanese knife? No. They remove too much metal, force the wrong angle, and can chip the thin, hard blade. Always use a whetstone.
How often should I sharpen my Japanese knife? For home use, every two to four months with a whetstone. Between sharpenings, a few strokes on a high-grit stone or a ceramic honing rod keeps the edge keen.
How do I know when the knife is sharp enough? It should slice cleanly through a sheet of paper without tearing, and bite into a tomato’s skin with no pressure. If it drags, return to the coarse stone and rebuild the edge.

3 Comments